Understanding the electrical systems in an RV is essential for both safety and comfort. Whether you’re a first-time RV owner or a seasoned traveler, having a thorough knowledge of RV electrical setups can enhance your travel experience and prevent potential mishaps.
This comprehensive guide covers everything you need to know about RV electrical systems, including components, maintenance, troubleshooting, and upgrades.
The Basics of RV Electrical Systems
RV electrical systems consist of two main components:
- AC (Alternating Current) System: This operates on 120 volts and is similar to the electrical system in your home. It powers devices like air conditioners, microwaves, and televisions when connected to shore power or a generator.
- DC (Direct Current) System: This operates on 12 volts and powers essential RV functions, including interior lights, water pumps, and the refrigerator control panel. It draws power from the RV’s battery system.
Both systems work together to provide the power needed for a comfortable RV experience.
Read More: How to Install RV Hookups at Home
Key Components of an RV Electrical System
- RV Batteries:
- RVs typically have two types of batteries:
- House Batteries: Power the 12-volt DC system for appliances and lights.
- Chassis Battery: Starts the engine and powers vehicle-related systems.
- Common battery types include lead-acid, AGM (Absorbed Glass Mat), and lithium-ion.
- RVs typically have two types of batteries:
- Converter:
- Converts 120-volt AC power from shore power or a generator into 12-volt DC power to charge the house batteries and power the DC system.
- Inverter:
- Converts 12-volt DC power from the batteries into 120-volt AC power for devices requiring standard outlets when shore power or a generator is unavailable.
- Shore Power Connection:
- The point where your RV connects to an external power source at campgrounds or home. Common connections include 30-amp and 50-amp setups.
- Generator:
- Provides 120-volt AC power when shore power is unavailable. Generators can run on gasoline, diesel, or propane.
- Solar Panels (Optional):
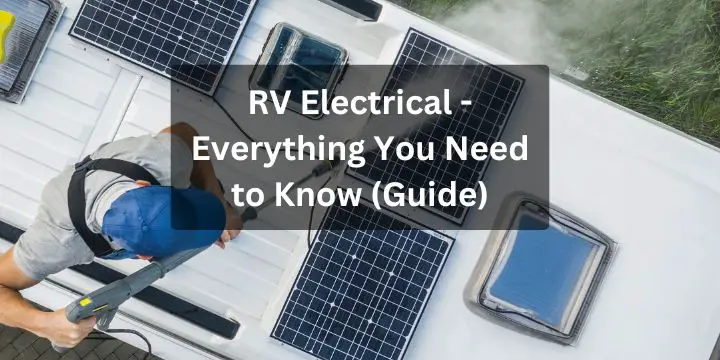
- Harness sunlight to charge your RV batteries, offering a sustainable and quiet energy source.
- Breaker Panel and Fuses:
- Distribute and protect electrical circuits. Breakers protect the AC system, while fuses safeguard the DC system.
Video Overview: RV Electrical Systems: 12 Volt and 120 Volt Power Flow Visualized
Understanding RV Amp Ratings
RV electrical systems are designed to work with specific amperage levels:
- 30-Amp System:
- Provides up to 3,600 watts of power (30 amps × 120 volts).
- Common in smaller RVs and powers basic systems but may require careful power management to avoid overloading.
- 50-Amp System:
- Provides up to 12,000 watts of power (50 amps × 240 volts).
- Found in larger RVs, offering more capacity for running multiple appliances simultaneously.
Knowing your RV’s amp rating is crucial when connecting to shore power to prevent tripping breakers or damaging appliances.
Read More: Best Road Trips for RV Travelers
Connecting to Shore Power
- Inspect the Power Pedestal:
- Check for visible damage or signs of overheating at the campground’s power pedestal.
- Use a Surge Protector:
- Plug a surge protector into the power pedestal before connecting your RV’s power cord. It protects against voltage spikes, surges, and faulty wiring.
- Plug In Safely:
- Connect the RV power cord to the surge protector and then to the power pedestal. Ensure the breaker is off before plugging in and turn it on after connecting.
- Test the Connection:
- Verify proper voltage and polarity using an electrical tester before using appliances.
Battery Maintenance and Care
- Regular Inspection:
- Check battery terminals for corrosion and clean with a baking soda solution if needed.
- Ensure cables are securely connected.
- Monitor Water Levels (for Lead-Acid Batteries):
- Refill with distilled water as needed to keep plates submerged.
- Charge Properly:
- Use a multistage charger to avoid overcharging or undercharging. Lithium-ion batteries require specific chargers.
- Store Correctly:
- Disconnect batteries when not in use for extended periods and store them in a cool, dry place.
- Check Voltage Levels:
- Use a voltmeter to ensure batteries are maintaining charge. A fully charged lead-acid battery reads around 12.6 to 12.8 volts.
Troubleshooting Common RV Electrical Issues
- Power Loss While Plugged In:
- Check the shore power connection, surge protector, and breaker panel.
- Dead Batteries:
- Inspect for parasitic drains, such as appliances left on or malfunctioning components.
- Test the converter to ensure it’s charging the batteries.
- Flickering Lights:
- Indicates a loose connection or low battery voltage. Check wiring and battery charge levels.
- Tripped Breakers:
- Reduce the number of appliances running simultaneously or upgrade to a higher amperage system if frequently overloaded.
- Appliances Not Working:
- Test outlets and verify the inverter’s functionality.
Video Overview: RV Power Problems – RV Electric Troubleshooting – No RV AC Power – RV Power Cord and Power Adapter
Upgrading Your RV Electrical System
- Install Solar Panels:
- Choose a system that matches your energy needs. A 100-watt panel generates around 30 amp-hours per day in optimal conditions.
- Upgrade to Lithium-Ion Batteries:
- Offers higher capacity, longer lifespan, and faster charging compared to lead-acid batteries.
- Add an Inverter/Charger Combo:
- Simplifies the system by combining an inverter and a battery charger into one unit.
- Upgrade to a 50-Amp Service:
- For more power capacity, convert a 30-amp system to a 50-amp system if your RV’s infrastructure supports it.
- Install a Monitoring System:
- Use a battery monitor or energy management system to track power usage and battery health in real time.
Safety Tips for RV Electrical Systems
- Avoid DIY Electrical Work:
- Hire a licensed electrician for major upgrades or repairs to ensure safety and compliance with codes.
- Use Proper Extension Cords:
- Only use heavy-duty cords rated for RV amperage requirements. Avoid standard household extension cords.
- Don’t Overload Circuits:
- Monitor power usage and avoid running high-demand appliances simultaneously.
- Protect Against Overheating:
- Ensure ventilation around electrical components, especially inverters and converters.
- Unplug During Storms:
- Disconnect from shore power during severe weather to prevent damage from lightning strikes.
Conclusion
Mastering your RV’s electrical system empowers you to travel safely and comfortably. From understanding the basics to troubleshooting issues and upgrading components, a well-maintained electrical setup ensures a stress-free experience. Whether you’re exploring remote areas with solar power or enjoying the conveniences of shore power, staying informed about your RV’s electrical needs is essential for any adventure.
Read More: RV and Camper Life with Pets: Tips for Traveling with Your Furry Friends


